

The Complete Guide to Pasting Panels on the Wall: Tools, Steps, and Important Tips
Transforming an interior space has never been more accessible, thanks to modern wall coverings. From the luxurious appearance of a Marble Sheet or Ceramic finish to the versatile aesthetics of Decorative Wall Panels, homeowners and designers have a plethora of options to revolutionize a room’s look and feel.
Among the various installation methods, the direct adhesive method, or pasting panels on the wall, stands out for its efficiency, simplicity, and professional finish. This comprehensive guide will walk you through every aspect of this process, ensuring your project is a resounding success. Whether you’re a seasoned DIY enthusiast or a first-timer, understanding the nuances of pasting panels on the wall is the key to achieving a flawless and durable result that enhances your home’s value and appeal.
Why Pasting Panels on the Wall is the Best Installation Method
When it comes to wall panel installation, you might encounter several methods, including mechanical fastening with screws or clips. However, for a vast majority of applications, pasting panels on the wall with a high-quality construction adhesive is the superior choice.
This method offers a seamless, clean appearance without visible screws or fasteners, which can detract from the aesthetic. The adhesive creates a continuous, strong bond across the entire back of the panel, distributing stress evenly and reducing the risk of warping or rattling over time. This is especially important for materials that need full support.
Furthermore, the process of pasting panels on the wall is significantly faster and less messy than traditional methods like plastering or even mechanical fixing. There’s no need for extensive drilling, which means less dust and debris to clean up. This makes it an ideal solution for quick renovations and updates.
For those looking for cost-effective solutions, this method often reduces labor costs if hiring a professional, and it simplifies the project for DIYers. The direct application of Affordable Wall Panels using adhesive can transform a space in a single weekend. The reliability of pasting panels on the wall ensures a long-lasting finish that looks professionally integrated into the room’s design, making it the go-to technique for modern interior projects.
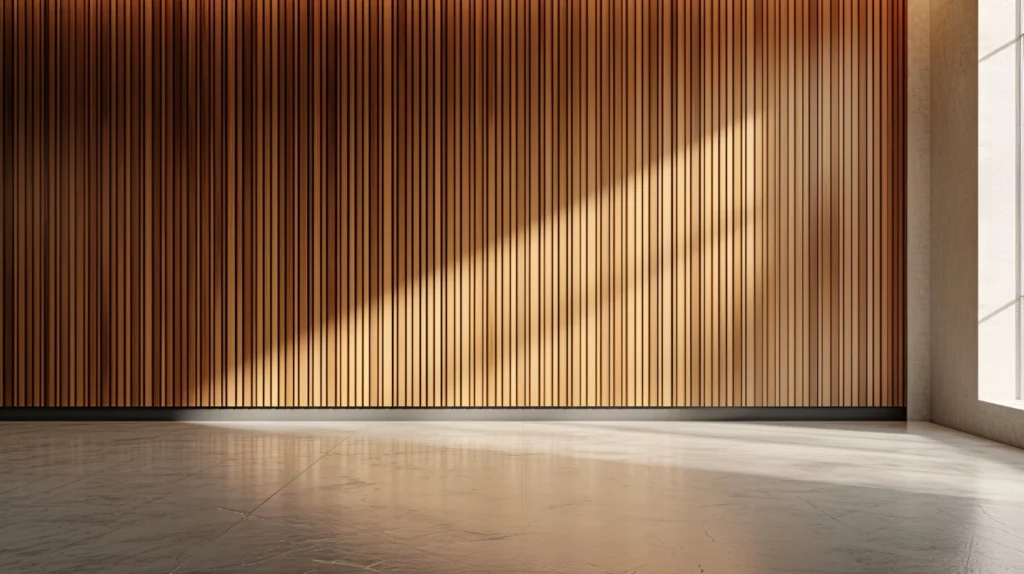
pasting panels on the wall
Tools and Materials Needed for Pasting Panels on the Wall
Before you begin the exciting task of pasting panels on the wall, gathering the right tools and materials is crucial. Proper preparation is half the battle and ensures a smooth, efficient, and safe installation process. Having everything on hand before you start will prevent interruptions and help you achieve a professional-grade finish. The specific materials may vary slightly depending on the panel type, such as a plastic thermowall versus a wooden panel, but the core toolkit remains largely the same.
Essential Tools:
- Measuring Tape: For accurate measurements of both the wall and the panels. Precision is key.
- Level (Laser or Spirit): To ensure your first panel and subsequent panels are perfectly straight. An uneven start will be magnified as you proceed.
- Utility Knife or Saw: A sharp utility knife works for thinner PVC or vinyl panels. For thicker materials like MDF or wood, a fine-toothed hand saw or circular saw will be necessary.
- Caulking Gun: Essential for applying construction adhesive evenly and controllably.
- Safety Glasses and Gloves: Protect your eyes from debris and your hands from adhesive.
- Pencil or Marker: For marking measurements and cutting lines on the panels.
- Straight Edge or Ruler: To guide your cuts for perfectly straight lines.
- Clean Rags or Sponges: For cleaning the wall and wiping away any excess adhesive immediately.
Essential Materials:
- Wall Panels: The panels of your choice. Ensure you order about 10% extra to account for mistakes or complex cuts.
- Construction Adhesive: Choose a high-quality adhesive specifically recommended for your panel material and wall surface. Read the manufacturer’s instructions carefully.
- Primer (if needed): For porous or newly plastered walls, a primer will seal the surface and ensure a stronger bond.
- Wall Cleaner/Degreaser: A solution like Trisodium Phosphate (TSP) or a simple soap and water mixture to prepare the wall surface.
- Painter’s Tape: Can be used to temporarily hold panels in place while the adhesive sets, especially on vertical surfaces.
Having these items ready will make the entire project of pasting panels on the wall feel less like a chore and more like a creative endeavor. Proper tooling is a non-negotiable part of the pasting panels on the wall process.
Step-by-Step Guide to Pasting Panels on the Wall
With your tools and materials ready, it’s time to begin the installation. Follow these steps carefully for a flawless result. This detailed guide to pasting panels on the wall is designed to be easy to follow for everyone.
Step 1: Wall Preparation
This is the most critical step. A clean, smooth, and dry wall is essential for a strong, long-lasting bond. Start by removing any old wallpaper, loose paint, or debris. Clean the entire wall surface with a degreaser or soapy water to remove any dust, grease, or grime. Rinse with a clean, damp cloth and allow it to dry completely.
If the wall has any holes or cracks, fill them with spackle, let it dry, and then sand it smooth. For glossy, painted surfaces, a light sanding will roughen up the surface and improve adhesion. If you are working with a new or porous wall (like unpainted drywall), apply a coat of primer. A well-prepared wall is the foundation of a successful project of pasting panels on the wall.
Step 2: Acclimatize Your Panels
Many panel materials, especially wood or composite products, can expand or contract with changes in temperature and humidity. To prevent this from causing issues after installation, it’s vital to acclimatize them. Unpack the panels and lay them flat in the room where they will be installed for at least 48-72 hours. This allows them to adjust to the room’s environment, ensuring a stable installation. This is a pro tip that many amateurs overlook when pasting panels on the wall.
Step 3: Measure and Plan Your Layout
Measure the height and width of your wall. Plan where you will start. It’s often best to start from the center of the wall and work your way out, or from one corner if it’s a less visible one. This ensures that any cut panels at the edges are of equal width, creating a balanced look. Dry-fit the first few panels on the floor to see how they connect and to finalize your layout.
This planning stage is crucial for an efficient process of pasting panels on the wall. When considering your project, you might even be thinking about other renovations, and while our focus is walls, some materials can be used for ceilings too, although the 60×60 ceiling panel price might differ significantly from wall paneling.
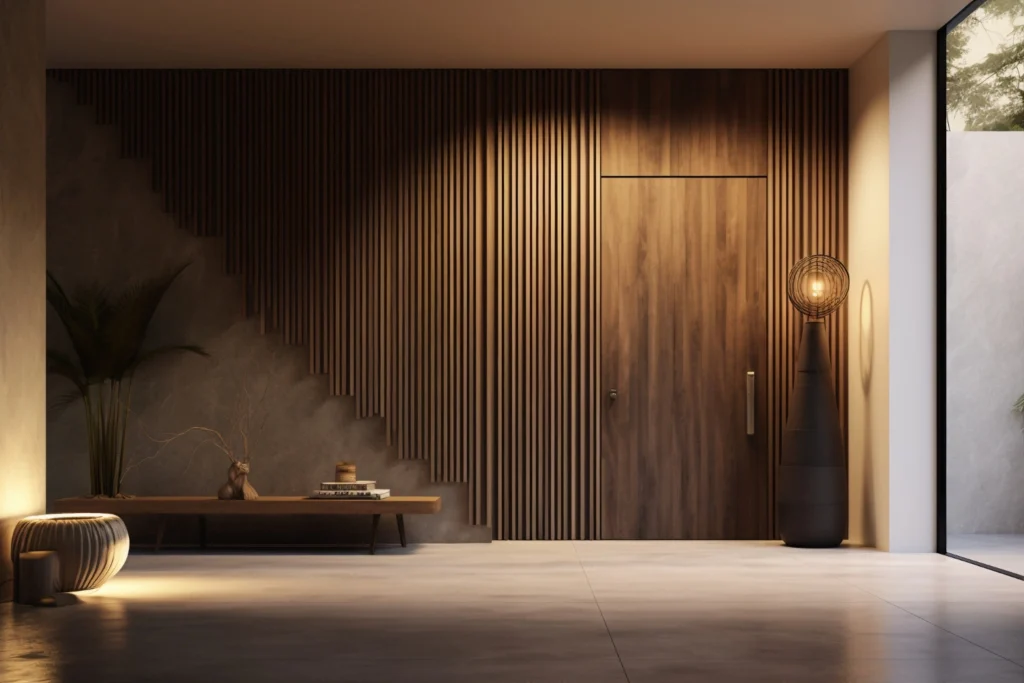
pasting panels on the wall
Step 4: Cutting the Panels
Transfer your measurements to the back of the panels. Use a straight edge and a pencil to draw your cut lines. Use the appropriate cutting tool for your panel material. For a clean cut, always use a sharp blade. If you are cutting a PVC reception wall panel, a utility knife may be sufficient. Take your time with this step; accurate cuts are essential for tight seams and a professional look. The success of pasting panels on the wall often comes down to the precision of your cuts.
Step 5: Applying the Adhesive
Load the construction adhesive into the caulking gun. Following the manufacturer’s recommendation, apply the adhesive to the back of the panel. A common and effective method is to apply a 1/4-inch bead in an “S” pattern across the back, as well as a continuous bead around the entire perimeter, about an inch from the edge. This ensures full coverage and a strong bond. Do not apply too much adhesive, as it can squeeze out of the seams. Mastering the adhesive application is a core skill for pasting panels on the wall.
Step 6: Installing the First Panel
This is the most important panel to get right. Carefully place the panel onto the wall along your starting line. Use your level to ensure it is perfectly plumb (vertically straight). Press the panel firmly against the wall, applying even pressure across its entire surface to set the adhesive. Some adhesives have an initial grab, while others may require you to hold the panel for a minute or use painter’s tape to secure it. The correct placement of this first piece dictates the outcome of your entire pasting panels on the wall project.
Step 7: Installing Subsequent Panels and Finishing
Install the next panel, fitting it snugly against the first one according to its design (e.g., tongue-and-groove or a simple butt joint). Wipe away any excess adhesive that squeezes out immediately with a damp cloth. Continue this process across the wall, checking for levelness every few panels.
Once all panels are installed, allow the adhesive to cure for the time recommended by the manufacturer (typically 24-48 hours). After curing, you can install any trim or molding to finish the edges. Your project of pasting panels on the wall is now complete!
| Adhesive Type | Curing Time | Best For | Pros | Cons |
|---|---|---|---|---|
| Polyurethane-Based Construction Adhesive | 24 hours (full cure 7 days) | Wood, PVC, Metal, Drywall | Very strong, waterproof, flexible | Can be messy, strong odor |
| Latex/Acrylic-Based Adhesive | 24-48 hours | Lightweight panels, foam, porous surfaces | Easy water cleanup, low odor | Not fully waterproof, lower strength |
| Epoxy | Varies (1-24 hours) | Stone, ceramic, heavy panels | Extremely strong, gap-filling | Requires mixing, shorter working time |
| Panel-Specific Adhesive | As per manufacturer | The specific panel it’s made for | Guaranteed compatibility | Can be more expensive, less versatile |
Important Tips for Pasting Panels on the Wall
To ensure your project is a complete success, keep these expert tips in mind. These small details can make a big difference in the final quality and longevity of your work when pasting panels on the wall.
- Dry Fit Everything: Before applying any adhesive, place the panel against the wall to check its fit. This is especially important for panels that need to be cut around outlets, switches, or windows. This is a crucial part of the pasting panels on the wall process.
- Check for Wall Flatness: Use a long straightedge to check if your wall is flat. Significant bows or dips can prevent the panels from adhering properly. High spots should be sanded down, and low spots can be filled. Proper preparation is essential for pasting panels on the wall.
- Work in a Ventilated Area: Many construction adhesives release fumes. Ensure the room has good airflow by opening windows or using a fan during the process of pasting panels on the wall.
- Don’t Skimp on Adhesive: While you don’t want to over-apply it, using too little adhesive will result in a weak bond and potential panel failure. Follow the manufacturer’s guidelines for bead size and pattern. Good adhesion is the goal of pasting panels on the wall.
- Consider the Material: Different materials require different handling. For example, a project involving Kenaf Installation may have different adhesive requirements than a heavy stone veneer. Always read the panel manufacturer’s specific installation instructions for pasting panels on the wall.
- Think Beyond Walls: The skills you learn can be applied elsewhere. While the focus here is walls, similar principles apply when installing Ceiling tiles for home, though gravity becomes a bigger factor.
- Urgent Renovations: If you’re on a tight schedule, options like an Affordable Thermowall can be installed very quickly using this method, making it ideal for fast-track projects. The efficiency of pasting panels on the wall is a major benefit.
- Bonding Popular Materials: For trendy materials like Thermowall, ensuring a complete and uniform bond is paramount to achieving its signature seamless look.
By following these tips, your experience with pasting panels on the wall will be much smoother, and the results will be far more professional. Every step, from planning to the final wipe-down, contributes to the overall success of pasting panels on the wall. The process of pasting panels on the wall is rewarding when done right.
Conclusion
Pasting panels on the wall is an excellent method for transforming any room with minimal disruption and maximum impact. It offers a clean, durable, and professional finish that is achievable for both professionals and DIY enthusiasts. By choosing the right materials, preparing your surface meticulously, and following a systematic, step-by-step process, you can confidently tackle this project. The versatility of modern wall panels, from sleek and modern to rustic and traditional, means there is a perfect solution for every style and budget. Remember that the key to a successful installation lies in preparation and patience.
Take your time, measure carefully, and apply the adhesive correctly. With this guide, you are now fully equipped with the knowledge to begin pasting panels on the wall and create a beautiful, updated space you can be proud of. The technique of pasting panels on the wall empowers you to take control of your home’s aesthetic. Ultimately, pasting panels on the wall is a skill that will serve you well in many future home improvement projects.
Frequently Asked Questions About Pasting Panels on the Wall
- 1. Can I paste panels directly over existing tiles or wallpaper?
- Pasting over tiles is possible if they are clean, degreased, and scuffed to create a bonding surface. However, it’s generally not recommended to paste over wallpaper. Wallpaper can peel over time, taking your new panels with it. For the best and most durable result when pasting panels on the wall, it’s always best to remove old wallpaper first.
- 2. What is the best adhesive for pasting panels on the wall?
- The best adhesive depends on the panel material and your wall surface. A polyurethane-based construction adhesive is a strong, versatile choice for most applications. However, always check the panel manufacturer’s recommendations first, as they will specify the most compatible product for a successful job of pasting panels on the wall.
- 3. How do I handle cutouts for electrical outlets and switches?
- Turn off the power to the circuit first. Measure the exact location of the electrical box and transfer these measurements to your panel. Use a drill to create a starting hole and a jigsaw or keyhole saw to cut out the opening. Always make the cutout slightly larger than the box for an easier fit. This is a detailed but necessary part of pasting panels on the wall.
- 4. Are the panels removable after pasting them on the wall?
- Removing panels that have been glued on is a destructive process. It will likely damage the wall surface (drywall paper) and the panels themselves. This method is intended for a permanent installation. If you need a temporary solution, a mechanical clip system might be a better choice than pasting panels on the wall.
- 5. Can this method be used in bathrooms or kitchens?
- Yes, but you must use panels that are 100% waterproof (like PVC or vinyl) and a waterproof, mold-resistant adhesive/sealant. Proper sealing of all seams and edges is critical in wet areas to prevent moisture from getting behind the panels. The technique of pasting panels on the wall is very common in these areas with the right materials. This is true whether you are using a unique material like Thermowall or a more traditional look. Even for ceilings, where you might consider Ceiling tiles for home, moisture resistance is key in these rooms. The overall success of pasting panels on the wall in humid environments depends on meticulous sealing.
This concludes our detailed guide. Happy renovating! The art of pasting panels on the wall is now yours to master. We are confident you can handle the process of pasting panels on the wall. Good luck with your project of pasting panels on the wall. Remember these tips for pasting panels on the wall.
This is the best way of pasting panels on the wall. The final look after pasting panels on the wall is worth the effort. Enjoy the results of pasting panels on the wall. Success in pasting panels on the wall is achievable. This guide covers all you need for pasting panels on the wall. The final step of pasting panels on the wall is to admire your work. We hope this helps your project of pasting panels on the wall.


